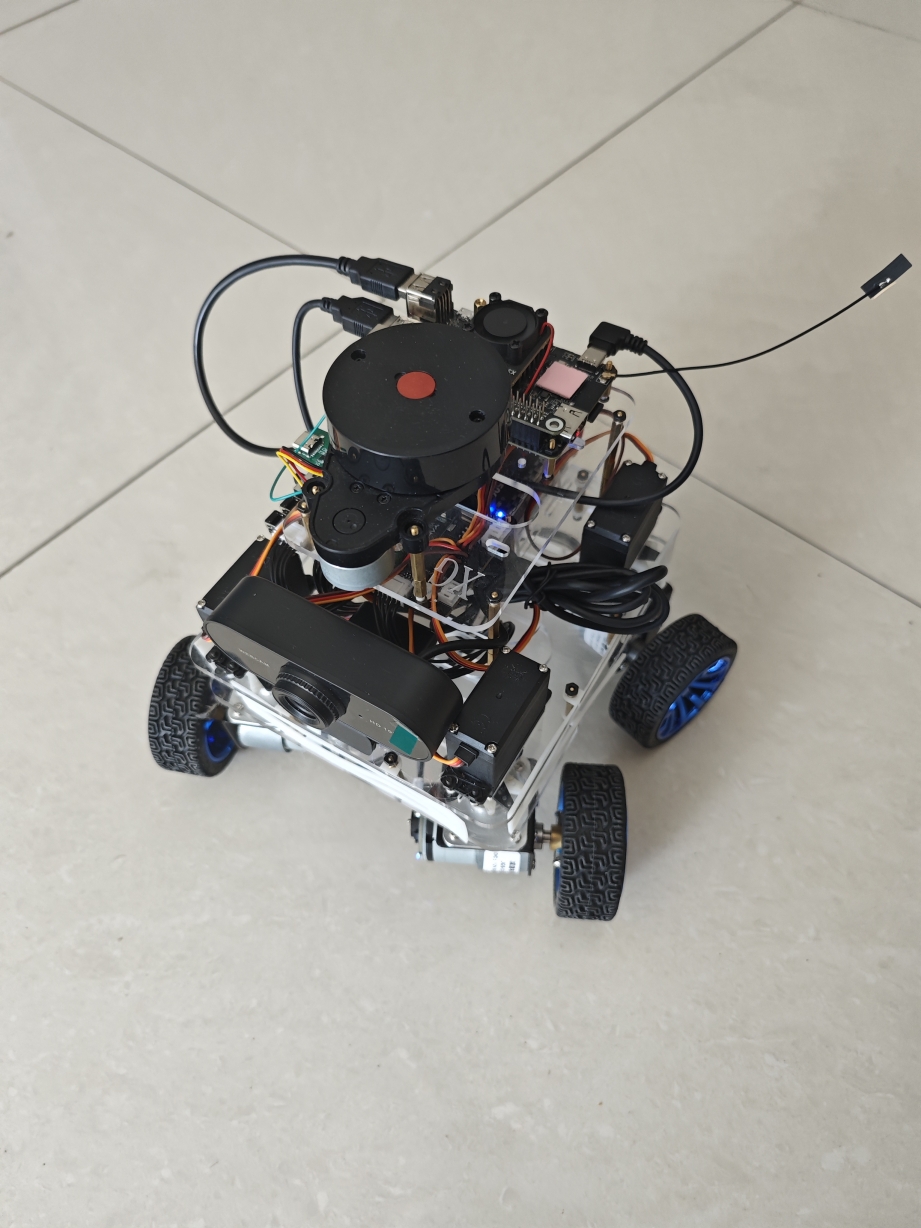
使用旭日X3派控制小车四驱四转
四驱四转转向原理

通过使用双阿克曼转向系统进行四轮转向解算:
\tan {\delta _{fl}} = \frac{{\tan {\delta _{fl}}}}{{1 - \frac{B}{{2l}}\left( {\tan {\delta _f} - \tan {\delta _r}} \right)}}
\tan {\delta _{fr}} = \frac{{\tan {\delta _f}}}{{1 + \frac{B}{{2l}}\left( {\tan {\delta _f} - \tan {\delta _r}} \right)}}
\tan {\delta _{rl}} = \frac{{\tan {\delta _r}}}{{1 - \frac{B}{{2l}}\left( {\tan {\delta _f} - \tan {\delta _r}} \right)}}
\tan {\delta _{rr}} = \frac{{\tan {\delta _r}}}{{1 + \frac{B}{{2l}}\left( {\tan {\delta _f} - \tan {\delta _r}} \right)}}
其中,B为前轮轮距,l为前轮到中心点的距离
k = \frac{{{\delta _f}}}{{{\delta _r}}}
根据动力学模型求解可以得出k的关系式:
k = \frac{{{\delta _r}}}{{{\delta _f}}} = \frac{{m \cdot v_x^2 \cdot {l_f} \cdot {K_f} - {l_f} \cdot \left( {{l_f} + {l_r}} \right) \cdot {K_r} \cdot {K_f}}}{{m \cdot v_x^2 \cdot {l_r} \cdot {K_r} + {l_f}\left( {{l_f} + {l_r}} \right) \cdot {K_r} \cdot {K_f}}}
通过matlab进行求解代码如下:
%%%qiujie.m
function  [thetafl,thetafr,thetarl,thetarr]=qiujie(thetaf)
    B=110e-3;%小车轮距宽 m
    l=127e-3;%小车轴距 m
    lf=63.5e-3;%小车前轴距 m
    lr=63.5e-3;%小车后轴距 m
    m=2;%小车质量 kg
    Kf=40000;%前轮胎侧偏刚度 N/rad
    Kr=40000;%后轮胎侧偏刚度 N/rad
    Vx=1;%小车纵向速度

    k=(m*Vx*Vx*lf*Kf-lf*(lf+lr)*Kr*Kf)/(m*Vx*Vx*lf*Kr+lf*(lf+lr)*Kr*Kf);%计算thetaf与thetar的比值
    thetar=thetaf/k;%求出thetar
    Q=B*(tan(thetaf)-tan(thetar))/(2*l);
    thetafl=atan(tan(thetaf)/(1-Q));%根据公式求解thetafl
    thetafr=atan(tan(thetaf)/(1+Q));%根据公式求解thetafr
    thetarl=atan(tan(thetar)/(1-Q));%根据公式求解thetarl
    thetarr=atan(tan(thetar)/(1+Q));%根据公式求解thetarr

end
控制部分
硬件部分
- 旭日X3派 —-1
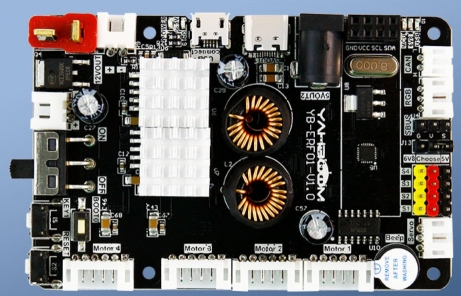
- STM32 ROS机器人控制板 —-1
- 520直流编码电机 —-4
- MG995数字舵机 —-4
- 12V电源 —-1
- XBOX手柄 —-1

软件部分
使用pygame库中的joystick插件进行控制,pygame.joystick 与游戏杆、游戏手柄、追踪球进行交互的 pygame 模块。
函数
-
pygame.joystick.Joystick.init() — 初始化
-
pygame.joystick.Joystick.quit() — 卸载Joystick
-
pygame.joystick.Joystick.get_init() — 检查Joystick是否初始化
-
pygame.joystick.Joystick.get_id() — 获得Joystick ID
-
pygame.joystick.Joystick.get_name() — 获得 Joystick 系统名称
-
pygame.joystick.Joystick.get_numaxes() — 获得 Joystick 操纵轴的数量
-
pygame.joystick.Joystick.get_axis() — 获得操纵轴的当前坐标
-
pygame.joystick.Joystick.get_numballs() — 获得 Joystick 上追踪球的数量
-
pygame.joystick.Joystick.get_ball() — 获得追踪球的相对位置
-
pygame.joystick.Joystick.get_numbuttons() — 获得 Joystick 上按钮的数量
-
pygame.joystick.Joystick.get_button() — 获得当前按钮状态
-
pygame.joystick.Joystick.get_numhats() — 获得 Joystick 上帽键的数量
-
pygame.joystick.Joystick.get_hat() — 获得 的位置
类
- pygame.joystick.Joystick — 新建一个 Joystick 对象
单个手柄演示代码:
#coding:utf-8
import pygame
# 模块初始化
pygame.init()
pygame.joystick.init()
# 若只连接了一个手柄,此处带入的参数一般都是0
joystick = pygame.joystick.Joystick(0)
# 手柄对象初始化
joystick.init()
done = False
clock = pygame.time.Clock()
while not done:
    for event_ in pygame.event.get():
        # 退出事件
        if event_.type == pygame.QUIT:
            done = True
        # 按键按下或弹起事件
        elif event_.type == pygame.JOYBUTTONDOWN or event_.type == pygame.JOYBUTTONUP:
            buttons = joystick.get_numbuttons()
            # 获取所有按键状态信息
            for i in range(buttons):
                button = joystick.get_button(i)
                print("button " + str(i) +": " + str(button))
        # 轴转动事件
        elif event_.type == pygame.JOYAXISMOTION:
            axes = joystick.get_numaxes()
            # 获取所有轴状态信息
            for i in range(axes):
                axis = joystick.get_axis(i)
                print("axis " + str(i) +": " + str(axis))
        # 方向键改变事件
        elif event_.type == pygame.JOYHATMOTION:
            hats = joystick.get_numhats()
            # 获取所有方向键状态信息
            for i in range(hats):
                hat = joystick.get_hat(i)
                print("hat " + str(i) +": " + str(hat))
    joystick_count = pygame.joystick.get_count()
pygame.quit()
XBOX连接旭日X3派教程具体见上一篇博客;
XG-robot四驱四转智能小车——旭日X3派连接蓝牙与控制小海龟(ROS2)
接下来就是用X3派运行python3程序进行控制,在运行过程中,需要控制STM32 ROS机器人控制板 ,因此需要下载,安装,运行Rosmaster_Lib库,具体Rosmaster_Lib库里的内容,不作过多赘述。
接下来就是整车的控制部分了,整体代码如下:
#!/usr/bin/env python3
#coding=utf-8
import time
from Rosmaster_Lib import Rosmaster
from ipywidgets import interact
import ipywidgets as widgets
import math
import pygame #手柄控制库
import matplotlib.pyplot as plt

import numpy as np
pygame.init()

pygame.joystick.init()
# 若只连接了一个手柄,此处带入的参数一般都是0
joystick = pygame.joystick.Joystick(0)
# 手柄对象初始化
joystick.init()
xxx=0#手柄左右摇杆位移  左- 右+
yyy=0#手柄上下摇杆位移  上- 下+
theta=0

B=110e-3  #小车轴距 m
l=127e-3   #小车轮距 m

#舵机中值
midtheta1=97
midtheta2=69
midtheta3=134
midtheta4=81

x1_old ,x2_old, x3_old ,x4_old=0,0,0,0
all_theta=0
# Rosmaster  bot Create the Rosmaster object bot
bot = Rosmaster()
# Start receiving data
bot.create_receive_threading()

# def car_runtype(models):
#     if models==0:

#     elif models==1:

#增量式PID控制
class IncrementalPID:
    def __init__(self, P, I, D):
        self.Kp = P
        self.Ki = I
        self.Kd = D
        self.last_error = 0.0
        self.output = 0.0
        self.integral = 0.0
    def calculate(self, setpoint, feedback_value):
        error = setpoint - feedback_value
        delta_error = error - self.last_error
        self.integral += error
        self.output += self.Kp * delta_error + self.Ki * error + self.Kd * delta_error
        self.last_error = error
        return self.output

#角度限制函数
def limittheta(theta,limitnum):
    if theta>=limitnum:
        theta=limitnum
    elif theta<=-limitnum:
        theta=-limitnum
    else : theta=theta
    return theta
#PWM波限制
def limitpwm(pwm):
    if pwm>=50:
        pwm=50
    elif pwm<=-50:
        pwm=-50
    else : pwm=pwm
    return pwm

# ????PWM??? Control PWM steering gear
def pwm_servo(S1, S2, S3, S4):
    bot.set_pwm_servo(1, S1)
    bot.set_pwm_servo(2, S2)
    bot.set_pwm_servo(3, S3)
    bot.set_pwm_servo(4, S4)

#双阿克曼控制函数
def doubleAKM(thetaf):
    thetar=-thetaf
    Q=B*(math.atan(thetaf)-math.tan(thetar))/(2*l)
    thetafl=math.degrees(math.atan(math.tan(thetaf)/(1-Q)))#thetafl
    thetafr=math.degrees(math.atan(math.tan(thetaf)/(1+Q)))#thetafr
    thetarl=math.degrees(math.atan(math.tan(thetar)/(1-Q)))#thetarl
    thetarr=math.degrees(math.atan(math.tan(thetar)/(1+Q)))#thetarr

    ##转角
    get_thetafl=midtheta1+limittheta(thetafl,20)
    get_thetafr=midtheta2+limittheta(thetafr,20)
    get_thetarl=midtheta3+limittheta(thetarl,20)
    get_thetarr=midtheta4+limittheta(thetarr,20)

    pwm_servo(get_thetafl,get_thetafr,get_thetarl,get_thetarr)


while True:

    try:
        for event_ in pygame.event.get():

            if event_.type == pygame.JOYBUTTONDOWN or event_.type == pygame.JOYBUTTONUP:

                if joystick.get_button(3)==1:

                    print("x")

                if joystick.get_button(4)==1:

                    print("y")
                if joystick.get_button(1)==1:

                    print("B")
                if joystick.get_button(0)==1:

                    print("A")
            elif event_.type == pygame.JOYAXISMOTION:
                xxx=joystick.get_axis(0)
                yyy=-joystick.get_axis(1)
                if 0.5>xxx and xxx>-0.5:
                    if 0.5>yyy and yyy>-0.5:
                        yyy=0
                        xxx=0

                if xxx==0:
                    theta=0

                if xxx!=0:
                    if yyy==0:
                        theta=90
                    if yyy!=0:
                        theta=(math.atan(xxx/yyy))*57.3
            for i in range(10):
                all_theta=theta+all_theta
            theta_out=all_theta/10
            all_theta=0

        print(theta_out)

        doubleAKM(limittheta(-theta_out/3,15))
        x1_out,x2_out,x3_out,x4_out=bot.get_motor_encoder()

        x1_now=x1_out-x1_old
        x2_now=x2_out-x2_old
        x3_now=x3_out-x3_old
        x4_now=x4_out-x4_old
        x1_old ,x2_old, x3_old ,x4_old= x1_out,x2_out,x3_out,x4_out

        print("bianmaqi:fl:%d,fr:%d,rl:%d,rr:%d\n",x1_now,-x2_now,-x3_now,x4_now)

        v1,v2,v3,v4=100,100,100,100

        #####PIDconture


        # p=widgets.IntSlider(min=-5,max=5,step=0.01,value=0)
        # i=widgets.IntSlider(min=-5,max=5,step=0.01,value=0)
        # d=widgets.IntSlider(min=-5,max=5,step=0.01,value=0)
        p=0.2
        i=0.1
        d=0
        pid_controller1 = IncrementalPID(p,i,d)
        pid_controller2 = IncrementalPID(p,i,d)
        pid_controller3 = IncrementalPID(p,i,d)
        pid_controller4 = IncrementalPID(p,i,d)
        PWM1=limitpwm(pid_controller1.calculate(v1,x1_now))
        PWM2=limitpwm(pid_controller2.calculate(v2,-x2_now))
        PWM3=limitpwm(pid_controller3.calculate(v3,-x3_now))
        PWM4=limitpwm(pid_controller4.calculate(v4,x4_now))

        print("PWM:fl:%d,fr:%d,rl:%d,rr:%d\n",int(PWM1), int(PWM2), int(PWM3), int(PWM4))
        bot.set_motor(int(PWM1), int(PWM2), int(PWM3), int(PWM4))

        time.sleep(0.1)
    except KeyboardInterrupt:
        break

bot.set_motor(0, 0, 0, 0) #速度给零
doubleAKM(0)#转角摆正
del bot #清除加载项
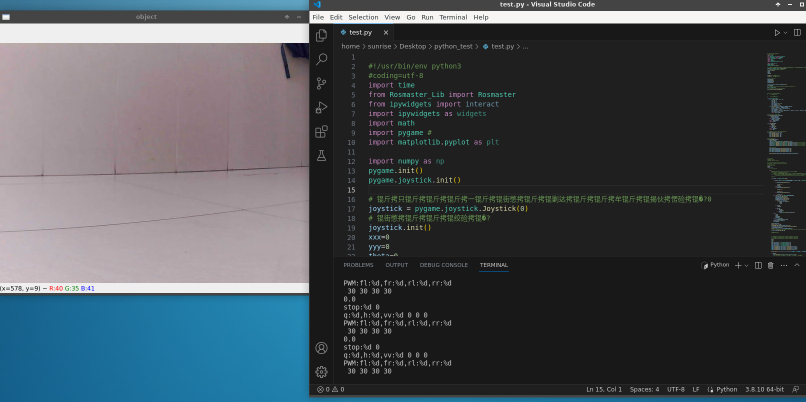
结果演示
接下来就是演示阶段,通过使用手柄进行控制,并通过打开摄像头程序,进行实时查看外部环境。


评论(3)
您还未登录,请登录后发表或查看评论