

MXNet框架用于做图像相关的项目时,读取图像主要有两种方式:第一种是读.rec格式的文件,优点是.rec文件比较稳定,移植到别的电脑上也能复现,缺点是占空间(.rec文件的大小基本上和图像的存储大小差不多),而且增删数据不大灵活。第二种是.lst和图像结合的方式,首先在前面生成.rec文件的过程中也会生成.lst文件,这个.lst文件就是图像路径和标签的对应列表,也就是说通过维护这个列表来控制你训练集和测试集的变化,优点是灵活且不占空间,缺点是如果图像格式不符合要求的话容易出错而且如果列表中的某些图像路径对应的图像文件夹中图像被删除,就寻找不到,另外如果你不是从固态硬盘上读取图像的话,速度会很慢。
分类与目标检测的制作流程会有所不同。
这边先简要介绍下idx,lst以及rec文件,可以跟后面结合看。
1、分类.lst文件样例:第一列是index,第二列是label,第三列是图像路径,图片一般同一个类别放同一个文件夹中,文件夹名称作为label
1812	1.000000	not-hotdog/83.png
294	        0.000000	hotdog/363.png
1168	1.000000	not-hotdog/25.png
785	        0.000000	hotdog/805.png
1735	1.000000	not-hotdog/760.png
444	        0.000000	hotdog/499.png
1199	1.000000	not-hotdog/278.png
747	         0.000000	hotdog/771.png
#检测样例,一般形式如下:
# I A B C D ~ id xmin ymin xmax ymax id xmin ymin xmax ymax ~ im_path
#I表示该图片样本的整数索引;A表示Header的长度(即ABCD长度),至少是 2;B表示每个bbox记录长度,C,D,…可选,
#表示存储的一些额外信息,一般C会表示样本 width,D表示样本 Height;id 表示该 bbox 所属的类别id;xmin,ymin,xmax,ymax表示bbox左上角和右下角的点坐标,且被归一化到[0,1]
3	4	5	500	333	6.0	0.312	                        0.2912912912912913	0.702	                0.8108108108108109	 ..\Dataset\VOC2007_set\000012.jpg
4	4	5	334	500	1.0	0.2754491017964072	0.144	               0.9131736526946108	0.946	             ..\Dataset\VOC2007_set\000016.jpg
7	4	5	375	500	6.0	0.088	                        0.296	            0.9893333333333333	        0.832	             ..\Dataset\VOC2007_set\000020.jpg
#.idx文件样例,idx 文件第一列与 lst 文件第一列对应,表示图片的索引,第二列是编码位置,具体如何编码未知。
1812	0
294	    1840
1168	3688
785	    5756
1735	8120
444	    9448
1199	10892
747	    12792
分类
1、创建文件夹:
首先需要在自己目录底下创建如下文件目录,im2rec为mxnet自带的源码,mxrec是空文件夹,用于存放打包之后的文件,images文件夹底下又有2个文件夹,hot_dog与not_hot_dog分别存放相应的图片,如果是10类那就要建立10个文件夹。
# .
# └── data
#     ├── mxrec
#     ├── im2rec.py
#     └── images
#         ├── hot_dog
#         └── not_hot_dog
2、使用im2rec.py进行打包。
直接执行以下命令:
python im2rec.py --list --recursive --train-ratio 0.8 mxrec/hot_dog_classification images
--list 说明要产生lst文件
–recursive 遍历所有子文件夹,并会给每一个子文件夹一个编号
--train_ratio 确定训练集和测试集的比例
mxrec/hot_dog_classfication 指的是文件命名前缀,存下来的文件会在mxrec文件夹,以hot_dog_classification为开头
images指的是我们要遍历的文件夹名字。
执行完这一步,我们就产生了文件列表。
#hot_dog_classification_train.lst
#hot_dog_classification_val.lst
3、根据lst,打包生成rec与idx文件。
#使用如下命令
python im2rec.py  mxrec/hot_dog_classification images --resize 32
--resize 32 是指将图片缩放至 32*32的大小
就形成如下的文件,数据就打包完成了

目标检测
目标检测有所不同,不能直接根据im2rec直接生成,这边举VOC2007为例。
文件格式仍如下所示,其中images里面放了VOC2007的图片以及图片的xml信息。
# └── data
#     ├── mxrec
#     ├── im2rec.py
#     └── images
VOV2007文件排列类似如下,
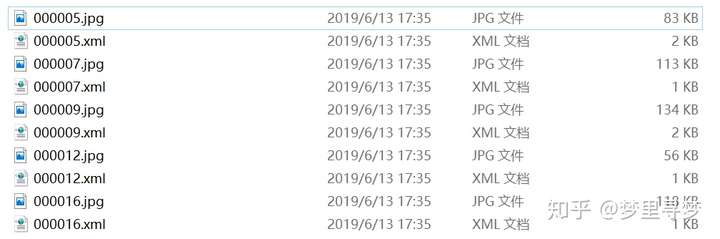
每个xml文件记录的是每张图片的标注信息等,一张图会记录多个锚框坐标,具体自行查看VOC2007的格式,示例格式如下:
<annotation>
	<folder>VOC2007</folder>
	<filename>000016.jpg</filename>
	<source>
		<database>The VOC2007 Database</database>
		<annotation>PASCAL VOC2007</annotation>
		<image>flickr</image>
		<flickrid>334761423</flickrid>
	</source>
	<owner>
		<flickrid>hesse00</flickrid>
		<name>?</name>
	</owner>
	<size>
		<width>334</width>
		<height>500</height>
		<depth>3</depth>
	</size>
	<segmented>0</segmented>
	<object>
		<name>bicycle</name>
		<pose>Rear</pose>
		<truncated>0</truncated>
		<difficult>0</difficult>
		<bndbox>
			<xmin>92</xmin>
			<ymin>72</ymin>
			<xmax>305</xmax>
			<ymax>473</ymax>
		</bndbox>
	</object>
</annotation>
1、制作lst文件
需要自己制作前文讲到的lst格式,这里是将xml文件制成lst的代码,其实就是抽取锚框坐标、锚框id以及图片名称、宽高的信息。
这些信息之间用'\t'来分隔开来,记住不是空格。
# -*- coding: UTF-8 -*-
import os
import sys
from xml.dom import minidom  #处理xml数据
from os.path import join
import argparse
import numpy as np

args = argparse.ArgumentParser()
args.add_argument("-d", "--dir",
                 help="path to target dataset.")
args.add_argument("-l", "--lst",
                 help="name of .lst file to be written.")
args.add_argument("-c", "--classFile",
                 help="path to txt file given classNames.")
args = args.parse_args()

def write_line(img_path, im_shape, boxes, ids, idx):
    h, w = im_shape
    # for header, we use minimal length 2, plus width and height
    # with A: 4, B: 5, C: width, D: height
    A = 4
    B = 5
    C = w
    D = h
    # concat id and bboxes
    labels = np.hstack((ids.reshape(-1, 1), boxes)).astype('float')
    # normalized bboxes (recommanded)
    labels[:, (1, 3)] /= float(w)
    labels[:, (2, 4)] /= float(h)
    # flatten
    labels = labels.flatten().tolist()
    str_idx = [str(idx)]
    str_header = [str(x) for x in [A, B, C, D]]
    str_labels = [str(x) for x in labels]
    str_path = [img_path]
    line = '\t'.join(str_idx + str_header + str_labels + str_path) + '\n'
    return line

import xml.etree.ElementTree as ET
def _parse_voc_anno(filename, classNames):
    tree = ET.parse(filename)
    height = int(tree.find('size').find('height').text)
    width = int(tree.find('size').find('width').text)
    objects = []
    all_boxes = []
    all_ids = []
    for obj in tree.findall('object'):
        obj_dict = dict()
        obj_dict['name'] = obj.find('name').text
        obj_dict['difficult'] = int(obj.find('difficult').text)
        bbox = obj.find('bndbox')
        box= [int(float(bbox.find('xmin').text)),
                            int(float(bbox.find('ymin').text)),
                            int(float(bbox.find('xmax').text)),
                            int(float(bbox.find('ymax').text))]
        obj_dict['bbox'] = box
        objects.append(obj_dict)
        all_boxes.append(box)
        cls_name = obj.find('name').text
        cls_id = classNames.index(obj.find('name').text)

        all_ids.append(cls_id)
    return height, width, objects, all_boxes, all_ids

def getClassNames(txtFile):
    with open(txtFile, "r") as f:
        classNames = f.readlines()[0].split(" ")
    return list(filter(None, classNames))

if __name__ == "__main__":
    #定义保存数据和标签文件夹路径
    path = args.dir
    lst_file_name = args.lst
    #获取xml文件中出现的所有类别名称
    classNames = getClassNames(args.classFile)
    names = os.listdir(path)
    lst = []
    i=0
    with open(lst_file_name,'w') as fw:
        for name in names:
            if name.endswith('.xml'):
                h,w,objs,all_boxes,all_ids = _parse_voc_anno(join(path, name), classNames)
                img_name = join(path, name.replace('xml','jpg'))
                shape = h,w
                all_boxes_np = np.array(all_boxes)
                all_ids_np = np.array(all_ids)
                line = write_line(img_name, shape, all_boxes_np, all_ids_np, i)
                print(line)
                fw.write(line)
                i+=1
    fw.close()
2、接下去就类似分类制作的流程一样了。


评论(0)
您还未登录,请登录后发表或查看评论