
本文实现对特定颜色的物体追踪,我实验用的是绿萝的树叶。
新建脚本ball_tracking.py,加入代码:
import argparsefrom collections import dequeimport cv2import numpy as np
导入必要的包,然后定义一些函数
def grab_contours(cnts): # 如果 cv2.findContours 返回的轮廓元组的长度为“2”,那么我们使用的是 OpenCV v2.4、v4-beta 或 v4-official if len(cnts) == 2: cnts = cnts[0] # 如果轮廓元组的长度为“3”,那么我们使用的是 OpenCV v3、v4-pre 或 v4-alpha elif len(cnts) == 3: cnts = cnts[1] else: raise Exception(("Contours tuple must have length 2 or 3, " "otherwise OpenCV changed their cv2.findContours return " "signature yet again. Refer to OpenCV's documentation " "in that case")) return cntsdef resize(image, width=None, height=None, inter=cv2.INTER_AREA): dim = None (h, w) = image.shape[:2] # 如果高和宽为None则直接返回 if width is None and height is None: return image # 检查宽是否是None if width is None: # 计算高度的比例并并按照比例计算宽度 r = height / float(h) dim = (int(w * r), height) # 高为None else: # 计算宽度比例,并计算高度 r = width / float(w) dim = (width, int(h * r)) resized = cv2.resize(image, dim, interpolation=inter) # return the resized image return resized
grab_contours 对于opencv不同版本做了兼容处理。
resize等比例改变图片的大小。
命令行参数ap = argparse.ArgumentParser()ap.add_argument("-v", "--video", help="path to video")ap.add_argument("-b", "--buffer", type=int, default=64, help="max buffer size")args = vars(ap.parse_args())# 绿色树叶的HSV色域空间范围greenLower = (29, 86, 6)greenUpper = (64, 255, 255)pts = deque(maxlen=args["buffer"])vs = cv2.VideoCapture(0)fps = 30 #保存视频的FPS,可以适当调整size=(600,450)fourcc=cv2.VideoWriter_fourcc(*'XVID')videowrite=cv2.VideoWriter('output.avi',fourcc,fps,size)
定义参数
–video :视频文件的路径或者摄像头的id
–buffer 是 deque 的最大大小,它维护我们正在跟踪的球的先前 (x, y) 坐标列表。 这个双端队列允许我们绘制球的“轨迹”,详细说明它过去的位置。 较小的队列将导致较短的尾部,而较大的队列将产生较长的尾部
定义hsv空间的上限和下限
启动摄像头0
最后是保存定义VideoWriter对象,实现对视频的写入功能while True: ret_val, frame = vs.read() if ret_val is False: break frame = resize(frame, width=600) # 通过高斯滤波去除掉一些高频噪声,使得重要的数据更加突出 blurred = cv2.GaussianBlur(frame, (11, 11), 0) # 将图片转为HSV hsv = cv2.cvtColor(blurred, cv2.COLOR_BGR2HSV) # inRange的作用是根据阈值进行二值化:阈值内的像素设置为白色(255),阈值外的设置为黑色(0) mask = cv2.inRange(hsv, greenLower, greenUpper) # 腐蚀(erode)和膨胀(dilate)的作用: # 1. 消除噪声; # 2. 分割(isolate)独立的图像元素,以及连接(join)相邻的元素; # 3. 寻找图像中的明显的极大值区域或极小值区域 mask = cv2.erode(mask, None, iterations=2) mask = cv2.dilate(mask, None, iterations=2)
开启一个循环,该循环将一直持续到 (1) 我们按下 q 键,表明我们要终止脚本或 (2) 我们的视频文件到达终点并用完帧。
读取一帧,返回两个参数,第一个参数是否成功,第二个参数是一帧图像。
如果失败则break。
对图像进行了一些预处理。首先,我们将框架的大小调整为 600 像素的宽度。缩小帧使我们能够更快地处理帧,从而提高 FPS(因为我们要处理的图像数据更少)。然后我们将模糊框架以减少高频噪声,并使我们能够专注于框架内的结构物体,例如球。最后,我们将帧转换为 HSV 颜色空间。
通过调用 cv2.inRange 处理帧中绿球的实际定位。首先为绿色提供下 HSV 颜色边界,然后是上 HSV 边界。 cv2.inRange 的输出是一个二进制掩码,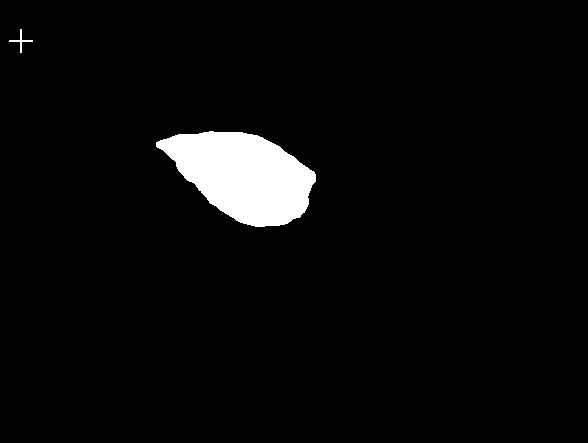
# 寻找轮廓,不同opencv的版本cv2.findContours返回格式有区别,所以调用了一下imutils.grab_contours做了一些兼容性处理 cnts = cv2.findContours(mask.copy(), cv2.RETR_EXTERNAL, cv2.CHAIN_APPROX_SIMPLE) cnts = grab_contours(cnts) center = None # only proceed if at least one contour was found if len(cnts) > 0: # find the largest contour in the mask, then use it to compute the minimum enclosing circle # and centroid c = max(cnts, key=cv2.contourArea) ((x, y), radius) = cv2.minEnclosingCircle(c) M = cv2.moments(c) # 对于01二值化的图像,m00即为轮廓的面积, 一下公式用于计算中心距 center = (int(M["m10"] / M["m00"]), int(M["m01"] / M["m00"])) # only proceed if the radius meets a minimum size if radius > 10: # draw the circle and centroid on the frame, then update the list of tracked points cv2.circle(frame, (int(x), int(y)), int(radius), (0, 255, 255), 2) cv2.circle(frame, center, 5, (0, 0, 255), -1)
pts.appendleft(center)
for i in range(1, len(pts)): # if either of the tracked points are None, ignore them if pts[i - 1] is None or pts[i] is None: continue
# compute the thickness of the line and draw the connecting line thickness = int(np.sqrt(args["buffer"] / float(i + 1)) * 2.5) cv2.line(frame, pts[i - 1], pts[i], (0, 0, 255), thickness)
cv2.imshow("Frame", frame) videowrite.write(frame) key = cv2.waitKey(1) & 0xFF
if key == ord("q"): breakvideowrite.release()vs.release()cv2.destroyAllWindows()
计算图像中对象的轮廓。在接下来的行中,将球的中心 (x, y) 坐标初始化为 None。
检查以确保在掩码中至少找到一个轮廓。假设至少找到一个轮廓,找到 cnts 列表中最大的轮廓,计算 blob 的最小包围圆,然后计算中心 (x, y) 坐标(即“质心”)。
快速检查以确保最小包围圆的半径足够大。如果半径通过测试,我们然后画两个圆圈:一个围绕球本身,另一个表示球的质心。
然后,将质心附加到 pts 列表中。
循环遍历每个 pts。如果当前点或前一个点为 None(表示在该给定帧中没有成功检测到球),那么我们忽略当前索引继续循环遍历 pts。
如果两个点都有效,我们计算轨迹的厚度,然后将其绘制在框架上。
运行结果:
AI小浩
转载自:https://wanghao.blog.csdn.net/article/details/122008100


评论(0)
您还未登录,请登录后发表或查看评论