

硬件
hx711模块使用原理图如下: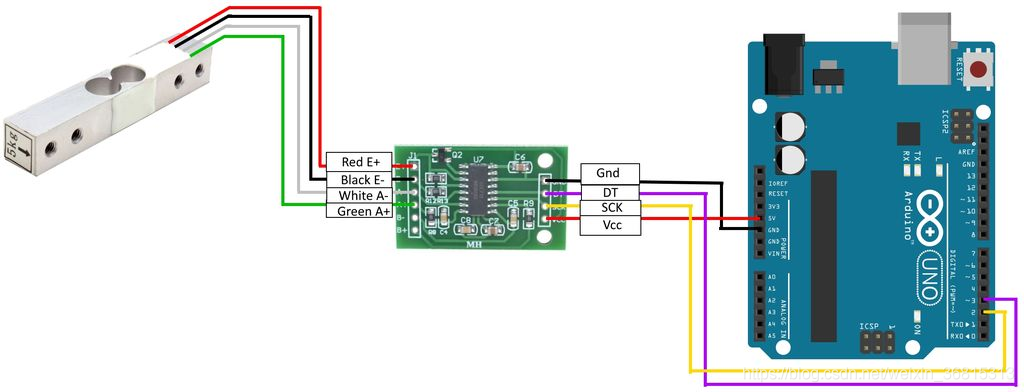
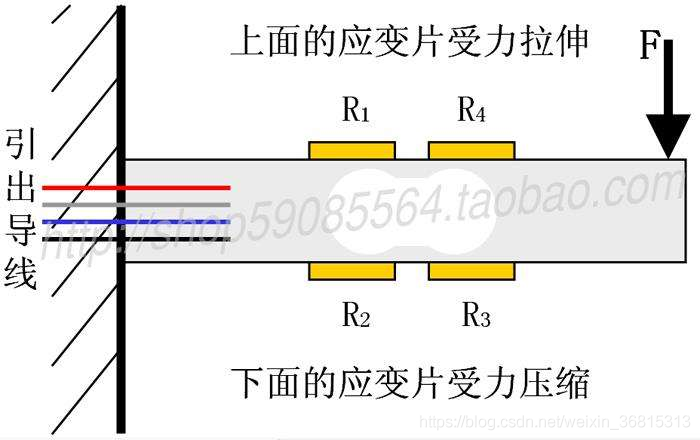
应变片原理
程序
使用此测试程序需要先下载 HX711 库文件。
下载方法:在“工具”—>“管理库”中,搜索“hx711”,并安装图示的库文件。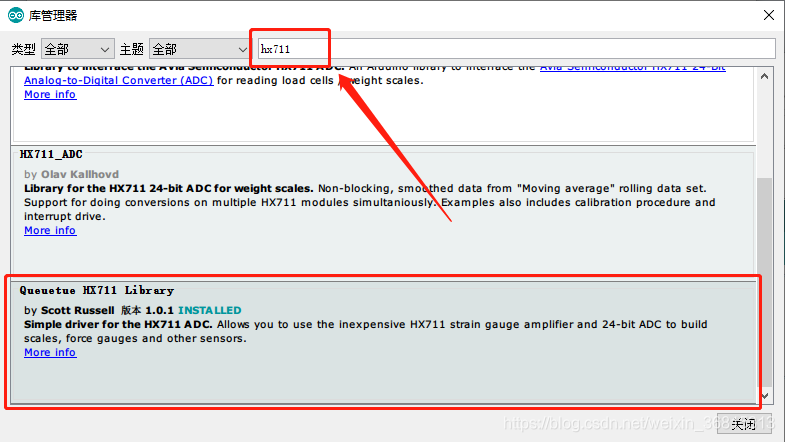
拉力计模块测试程序:
/******************************************************************
* 程序名称:拉力计模块 HX711 使用
* 程序功能:显示模块读取到的数值
* 程序版本:Ver 1.0
* 编写日期:2020/07/30
* 作者信息:天津科技大学创新实验室-JC
******************************************************************/
#include <Q2HX711.h>

const byte hx711_data_pin = 48;
const byte hx711_clock_pin = 47;

Q2HX711 hx711(hx711_data_pin, hx711_clock_pin);

void setup() {
  // put your setup code here, to run once:
  Serial.begin(9600);
}

void loop() {
  // put your main code here, to run repeatedly:
  Serial.println(hx711.read()/100.0);
  delay(500);
}
两个拉力计模块同时使用程序:
/******************************************************************
* 程序名称:拉力计模块 HX711 使用
* 程序功能:同时读取两个模块的数值
* 程序版本:Ver 1.0
* 编写日期:2020/07/30
* 作者信息:天津科技大学创新实验室-JC
******************************************************************/
#include <Q2HX711.h>

const byte hx711_data_pin = 48;
const byte hx711_clock_pin = 47;

const byte hx712_data_pin = 52;
const byte hx712_clock_pin = 50;

Q2HX711 hx711(hx711_data_pin, hx711_clock_pin);

Q2HX711 hx712(hx712_data_pin, hx712_clock_pin);

void setup() {
  // put your setup code here, to run once:
  Serial.begin(9600);
}

void loop() {
  // put your main code here, to run repeatedly:
  Serial.print("hx711 Value:");
  Serial.println(hx711.read()/100.0);
  Serial.print("hx712 Value:");
  Serial.println(hx712.read()/100.0);
  delay(500);
}


评论(0)
您还未登录,请登录后发表或查看评论