

作者@阿利同学,邮箱:1309399183@qq.com
1.主要内容和目标
本文讲述如何运用代码来将迷糊图像进行复原,以达到清晰图像以及细节增强的目的。
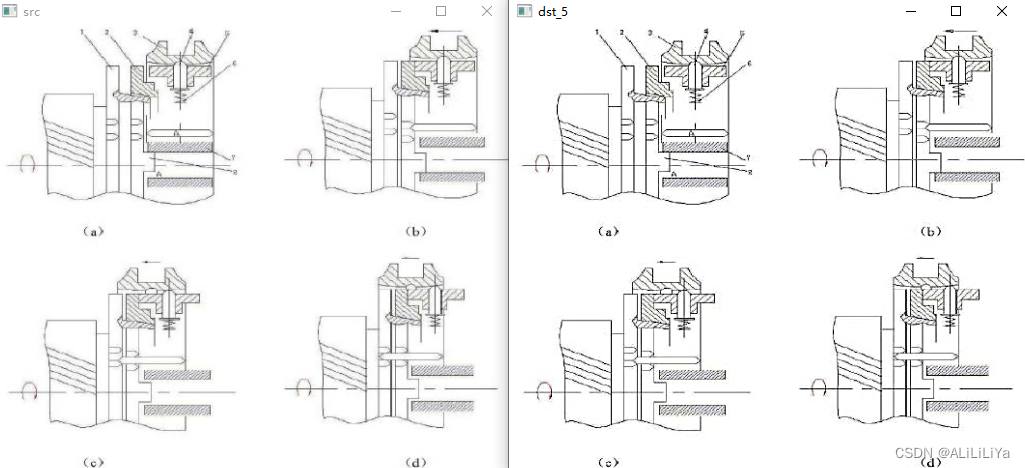
首先呈现了前后对比图,左图为模糊原图,右图为复原图像。
(不只是用在二值图像)
2.代码讲述
```python
def multiScaleSharpen(img ,radius):
    h,w,chan = img.shape

    GaussBlue1 = np.zeros(img.shape,dtype = uint8)#创建mask
    GaussBlue2 = np.zeros(img.shape, dtype=uint8)
    GaussBlue3 = np.zeros(img.shape, dtype=uint8)
    Dest_float_img = np.zeros(img.shape, dtype=float32)
    Dest_img = np.zeros(img.shape, dtype=uint8)

    w1 = xx#权重选择
    w2 =xx
    w3 = xx

    GaussBlue1 = cv2.GaussianBlur(img,(radius,radius),x)#高斯模糊
    GaussBlue2 = cv2.GaussianBlur(img,(radius*x,radius*x),x)
    GaussBlue3 = cv2.GaussianBlur(img,(radius*x,radius*x),x)

    for i in range(0,h):#遍历图像
        for j in range(0,w):
            for k in range(0,chan):
                Src = img.item(i,j,k)
                D1 = Src-GaussBlue1.item(i,j,k)
                D2 = GaussBlue1.item(i,j,k) - xxx
                xxxx=xxx+xxxx
                Dest_img=xxxx
    return Dest_img
if __name__ == '__main__':
    img = cv2.imread('C:\\Users\\AIR\\Desktop\\a\\imwrite\\11.png',1)

    #img = cv2.imread("128.jpg")
    h,w,d=img.shape
    multiScaleSharpen_out = np.zeros((h,w,d), dtype=uint8)
    multiScaleSharpen_out = multiScaleSharpen(img,5)#jishu
    multiScaleSharpen_out1 = np.zeros((h,w,d), dtype=uint8)
    multiScaleSharpen_out1 = multiScaleSharpen(img,11)#jishu
    cv2.imwrite('C:\\Users\\AIR\\Desktop\\a\\imwrite\\12.png',multiScaleSharpen_out)
    cv2.imshow('src',img)
    cv2.imshow('dst_5',multiScaleSharpen_out)
    cv2.imshow('dst_11',multiScaleSharpen_out1)
上述细节增强和模糊复原有一定去雾功效。
根据此模板,利用加权高斯滤波,将完成模糊图像复原。可以将论文中的模糊图像复原,完成毕业设计用。


评论(0)
您还未登录,请登录后发表或查看评论